From download to your own app on your phone
No coding and no tech background needed. Follow these steps once, then build and change your app with AI whenever you like, straight from your iPhone.
What you need
- 💻 A Mac (needed to build iPhone apps)
- 📱 An iPhone
- 📶 Wi-Fi that both can join
- 🍎 A free Apple ID (the one you already use is fine)
- 🤖 An account with an AI assistant, such as a Claude plan
- 1Mac5 minutes
Download the desktop app
Download VybeCoding for Mac from the download page. Open the file, drag VybeCoding into Applications, then open it.
The first time it opens, it walks you through installing an AI assistant such as Claude Code and signing in to it. The AI is what writes your app, and the desktop app is where it runs.
- 2Mac1 minute
Turn on Remote Login
This lets your phone connect securely to your Mac. Open System Settings → General → Sharing and switch on Remote Login.
 Tip: Your phone will ask for your Mac's username and password later. They're the ones you use to log in to the Mac. You can see the username under System Settings → Users & Groups.
 - 3Mac + iPhone1 minute
Put your phone and Mac on the same Wi-Fi
Your phone finds your Mac, and installs apps onto itself, over your local Wi-Fi. Connect both to the same network, like your home or office Wi-Fi.
Tip: Away from home, a VPN such as ZeroTier lets you keep chatting with the AI, but installing an app onto your iPhone only works when both are on the same local network. - 4iPhone2 minutes
Get the VybeCoding app
Download VybeCoding from the App Store and open it. Allow it to find devices on your local network when it asks.
- 5iPhone2 minutes
Connect your phone to your Mac
Your Mac appears under Nearby. Tap it, enter your Mac's username and password, and save. Tap the Mac to expand it: when the desktop app is running you'll see Desktop App found underneath.
- 6iPhone1 minute
Create your first project
Under your Mac, tap New Project and give it a name. VybeCoding then offers skills: short guides the AI follows while it works on this project. Tick any you want, or tap Skip.
Open the project, tap New Session and choose your AI (for example Claude).
- 7iPhone5–15 minutes
Describe the app you want
Type (or say, with the microphone button) what you want, in plain English. For example:
Build me a simple iPhone app that tracks my daily water intake, with a big + button and a chart of the last 7 days. Use SwiftUI.
The AI creates the project and writes the code. Answer its questions as it goes.
- 8Mac + iPhone5–30 minutes the first time
Check your setup with one tap
Tap the orange Build button, then Check Setup. VybeCoding checks everything your Mac needs to put an app on your iPhone, and tells you exactly how to fix anything that's missing. Work down the list until it says You're good to go. It checks:
- Xcode: Apple's free app for building iPhone apps. Install it from the Mac App Store (about 10 GB) and open it once.
- Your Apple ID in Xcode: in Xcode open Settings → Accounts and sign in. A free Apple ID works (see below).
- Your iPhone is paired: plug it into the Mac with a cable once, unlock it and tap Trust. In Xcode open Window → Devices and Simulators, select your iPhone and tick Connect via network. After that you don't need the cable.
- Developer Mode: on the iPhone open Settings → Privacy & Security → Developer Mode and turn it on. It appears after the iPhone has been connected to Xcode once.
- Your project's signing team: the project must be set to sign with your Apple ID.
Tip: Every problem has an Ask AI to Fix button. It hands the problem to the AI in your terminal, which fixes what it can on your Mac and walks you through anything only you can do.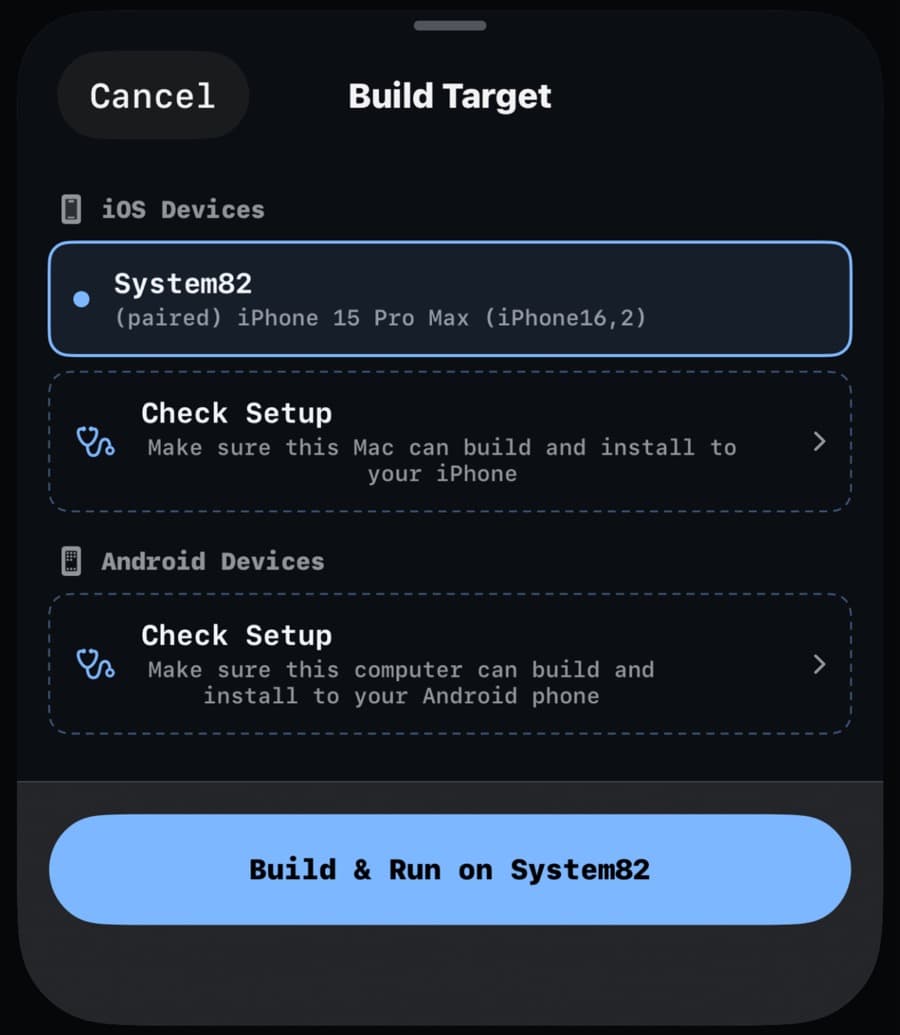
- 9iPhone1–3 minutes
Build it to your phone
Tap Build, choose your iPhone and tap Build & Run. Your Mac builds the app and installs it on your phone over Wi-Fi. You can watch the progress in the build log.
The very first time, your iPhone won't open the app until you trust it: open Settings → General → VPN & Device Management, tap your Apple ID under Developer App and tap Trust. You only do this once.
- 10iPhoneSeconds per change
Change it with AI, build again
That's the loop. Tell the AI what to change ("make the button blue", "add a settings screen"), tap Build, and the new version replaces the old one on your phone. Your app, built and changed from your phone.
You don't need a paid Apple developer account
To build and test apps on your own iPhone, a free Apple ID is enough. Xcode calls it your Personal Team, and it's what you pick under Signing & Capabilities (Check Setup tells you if it isn't set).
Free Apple ID
- ✓ Build and run your apps on your own iPhone
- ✓ Change them with AI as often as you like
- • Apps stop opening after 7 days; tap Build to refresh them
- • Up to 3 of your apps on the phone at once
- • Some features aren't available, such as push notifications, iCloud, Apple Pay and Sign in with Apple
Apple Developer Program ($99/year)
- ✓ No 7-day limit or 3-app limit
- ✓ All features, including push notifications and iCloud
- ✓ Share test versions with TestFlight
- ✓ Publish to the App Store
- • Only needed when you're ready to share or sell your app